
The Finished Product
Figures 43 and 44 show front and rear views of the finished wheel. Figure 45 is a detail shot of the joint again highlighting the spline element. Sadly the pictures don't do the shine justice as it's really deep and clear with just the slightest hint of amber.
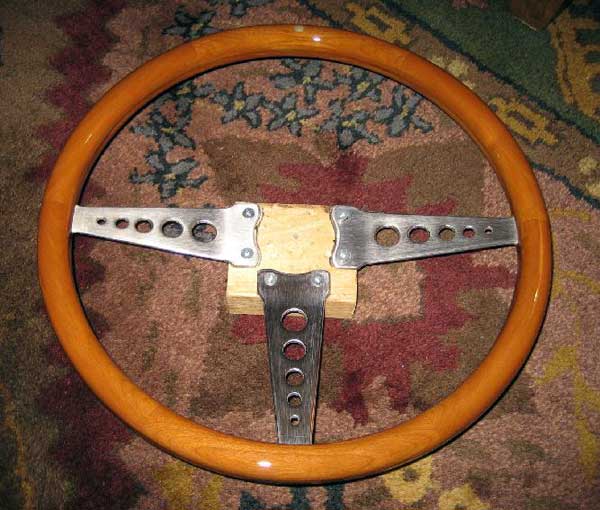
Figure 43: Complete wheel after five coats of varnish (front view)
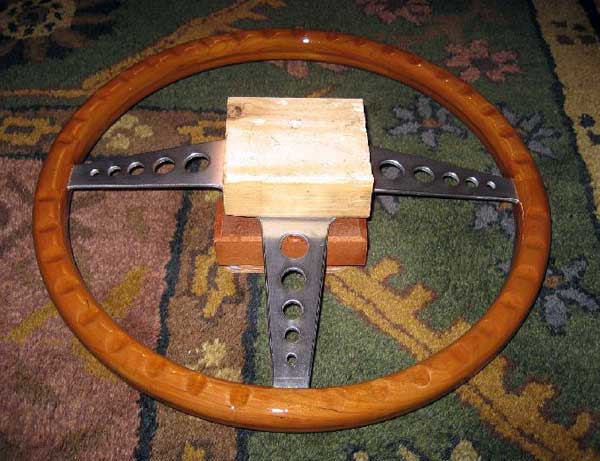
Figure 44: Completed wheel (rear view)
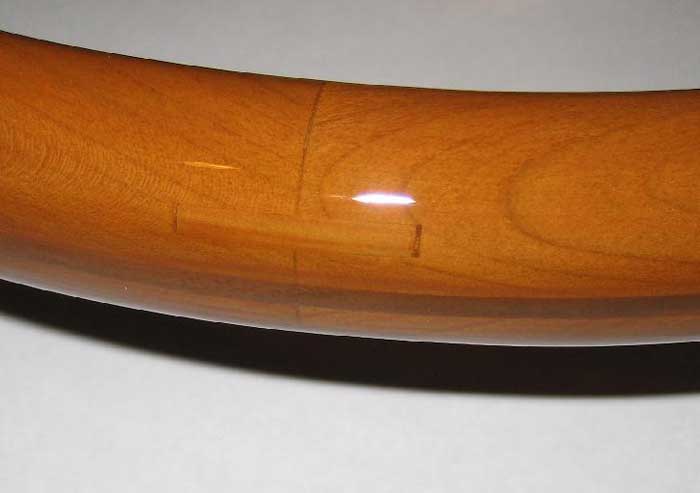
Figure 45: Completed wheel, joint detail
Conclusions
Finally finished, it's time to quaff a couple adult beverages and look back over the effort!
I spent a total of about 23 hours on the project (see breakdown below). Having never done a project like this before, I can definitely see where to save time should I have the desire to build another. Regardless, I am very satisfied with the finished wheel. I can say without hesitation it was worth the time and effort because no one else will have a wheel exactly like mine and that means something to me.
I'm also completely satisfied that the finished wheel looks like it could have been on the car from the factory, albeit perhaps as an extra cost option. I definitely met all of my objectives and thoroughly enjoyed the process. I recommend such a project to anyone considering it – it's not terribly difficult, only a few tools are necessary, and the satisfaction obtained cannot be duplicated by simply buying a store bought wheel.
Total price breakdown (USD):
- $53.57 - Wood (Rockler Woodworking Store)
- $10.86 - Epoxy Filler (Redondo Beach Marine Hardware)
- $3.90 - Mother of Pearl inlay (Rick's Guitars)
- $39.67 - Bronze wool and 1pt Interlux Schooner Varnish (Redondo Beach Marine Hardware)
I already had all other materials and equipment such as West System epoxy, Gorilla Glue, Sandpaper, router bits, router, jigsaw, block plane, etc.
Total Cost: $108.00 (exceeded cost target by $8)
Rough time line for finished wheel (does not include design time or fabrication of the pine prototype):
- 2 hrs cut pieces and begin glue up of wood blanks 2 hrs complete glue up of wood blanks
- 1 hr layout on hex blanks
- 0.5 hr rough cut prior to routing operations
- 1.5 hr rout groove
- 2 hrs rout ID and OD
- 3 hrs finish ID and round over all edges, dremel to fit frame to wood 0.5 hr preliminary sanding with 150 grit
- 1 hr file finger grooves including creation of jig
- 1 hr glue up of front half
- 1hr glue up of back half
- 2 hrs finish sanding and inlay of mother-of-pearl
- 0.5 hr stain
- 1 hr first topcoat
- 1 hr second topcoat
- 1 hr third topcoat
- 1 hr fourth topcoat
- 1 hr fifth topcoat
Total time: 23 hours
If I had it to do over, would I do anything differently? Of course that's always a difficult question to ask yourself, but I tend to be a bit of a perfectionist so I can usually find things to improve. Not knowing exactly how the black walnut will darken with age, I'd probably choose a different accent wood given the chance to do this again. I'd likely go with the darkest, blackest wood I could find so that it would be a very obvious stripe on the ID and OD or perhaps I should have stained the walnut a very dark color before laminating it to the cherry. Perhaps that's being a bit too hard on myself especially since it's a matter of taste anyway. Oh well, something to consider for the next wheel I make...
Hope you enjoyed this article and if you have any questions please scroll down and leave your comments below!

")


your help, perhaps one day will come and be ready for Spring! Thanks for your detailed and
documented explanation of hoe to get 'er done!
you.
Now to find a steering wheel on Ebay for the progect.
Any project need a plan and a starting point. Reading this article is a great start.
Can you tell me what you did to the metal? It looks so shiny and pretty.. I am trying to restore mine (I have that same one with the foam) I just removed the surface rust, but the metal looks like stained. Any help is appreciated!
morris minor wheel....
morris minor wheel....
project instructions but with a different steering is it possible to
cut and weld peices so that it becomes a quick release because the
steering i have has round edges and the midle (center part)is for stock
cars... need your help thanks
similar, but based on the original sprung/dished profile Minor steering
with a thinner rim. Though this would entail some unique difficulties of
its'own I think. One day. Great article.
me money!
Thank you!
process, use of a prototype, making the few tools you had work, and
general description of how and why you did what you did. Finished
product looks outstanding.
Want to leave a comment or ask the owner a question?
Sign in or register a new account — it's free